Your cart is currently empty!
Author: root
-
Running a Bitcoin Full Node: Practical Guide for the Experienced Operator
So you’re already comfortable with wallets, seeds, and the basic lingo, but you want to run a full node that actually matters — not just for ego, but to validate independently and contribute to network health. Good. I run nodes, have broken and fixed them in the middle of the night, and have opinions. This article is about real choices: trade-offs, gotchas, and the operational mindset that turns a hobby node into a resilient, validating participant of Bitcoin.
Short version: a full node is a validator. It downloads block data, verifies consensus rules, enforces policy locally, and serves RPC/peer traffic. Don’t run one to “earn bitcoin”—that’s a misconception. Do run one to avoid trusting third parties, to support the network, and to give yourself cryptographic sovereignty.

What “validation” really means
Validation isn’t just “checking signatures.” It’s verifying every rule from genesis to tip: block structure, Merkle trees, script execution limits, consensus upgrades (BIPs and soft forks), and block weight. When your node says a transaction is valid, it’s because it traced that tx back to unspent outputs and re-executed scripts within consensus limits. That’s powerful. It means you don’t have to trust explorers or custodians.
Practically, that implies your node needs correct code, reliable I/O, and accurate time. A buggy client build or flaky disk can make you believe something false — so maintain the software and environment like it’s production-grade. Not optional.
Hardware and storage considerations
If you want full archival history and maximum future-proofing, plan for fast SSD and lots of space. The raw blockchain is tens of GBs today; if you keep the mempool, indexes, and optional rescan data it grows. For most operators, a modern NVMe with 1–2 TB is a sweet spot. HDDs are okay for pruned nodes but expect slower initial sync and higher I/O latency.
Memory matters, too. The UTXO set and in-memory structures benefit from at least 8–16 GB for smooth operation; 4 GB can work, but you may see disk thrashing. CPU is less critical than disk, but fewer cores slow parallel validation during IBD (initial block download).
One practical config: dual-core CPU, 16 GB RAM, 1 TB NVMe, and a reliable UPS. That’s enough for an always-on validating node and lighting testbed. If you host multiple services (Lightning, ElectrumX, archival indexing), scale up accordingly.
Pruning vs. archival mode: the trade-offs
Pruned nodes keep only recent block data and still fully validate the chain. They don’t serve historical blocks to peers. If you need full history (for chain analytics, archival services, or certain APIs), run without pruning. For privacy and independent validation of current state, pruning is fine and saves space.
Consider this: pruned nodes still detect double-spends and fully validate UTXO state, but you can’t re-scan old addresses beyond the pruned limit. That matters for recovery scenarios. So, if your use-case includes long-range rescans, don’t prune.
Network setup, ports, and privacy
Open port 8333 to accept incoming connections if you can. More inbound connections make the network stronger and gives you better peer diversity. If you’re behind NAT, set up port forwarding. If you value privacy, combine Tor with your node to limit leakage: run hidden service for listening and route outgoing peers over Tor when desired.
Heads-up: running Tor adds complexity and latency. If you’re unfamiliar with Tor, start with clearnet peers, then gradually add Tor once you understand fingerprinting and onion-address hygiene. Don’t mix misconfigurations and expect privacy.
Software and updates
Use official releases, signed and verified. The project pages and release signatures reduce risk of compromise. If you build from source, document the build environment and keys. Automatic updates are convenient but can be risky for validators that require stable uptime. Many operators prefer manual controlled upgrades after reading release notes.
For bitcoin core, check the release center and verify signatures before installing. If you want, the official bitcoin core page is the first stop for binaries, docs, and release info. (Yes, verify signatures every time. I’m biased but it’s a habit worth keeping.)
Monitoring, alerts, and maintenance
Set up basic monitoring: block height, peer count, disk health, memory pressure, and CPU usage. Use alerting for low disk space and uptime failures. Small automation like graceful shutdown scripts on UPS signals saves you from database corruption after power loss.
IBD is the most I/O heavy operation. Schedule heavy tasks (wallet rescans, indices rebuilds) during low-impact times, or better yet, offload them to a CPU dedicated to test or secondary nodes. Backup: keep your wallet.dat or descriptor backups offline and encrypted. A node resync is annoying but recoverable; losing wallet keys is not.
Security and operational best practices
Minimize attack surface. Don’t expose RPC to the internet. If you need remote access, use SSH tunnels, VPN, or an authenticated reverse proxy. Limit RPC to localhost by default and use cookie authentication or RPCusername/RPCpassword if necessary.
Run the node under its own user account. Practice least privilege for any services interacting with it. Rotate keys and credentials. Consider read-only RPC endpoints for auxiliary services to avoid accidental wallet commands from third-party apps.
Running a node with Lightning or L2 services
If you’re pairing a node with a Lightning implementation (LND, c-lightning, etc.), expect additional resource needs and frequent state churn. Lightning benefits from a stable, well-connected on-chain node; likewise, the node benefits from Lightning for validating channel commitments locally. But don’t conflate running a node with running custodial services—one is sovereign, the other is not.
Test on a secondary node first. I’ve seen operators break their main node by enabling aggressive indices or experimental flags without testing. Start small, then expand.
Common failure modes and how to recover
Disk failure: restore from a recent snapshot or re-sync from peers. Corruption due to unclean shutdown: use the provided DB rebuild tools. Stuck in IBD: check peers, time sync (NTP), and disk I/O — sometimes a slow HDD is the root cause. Wallet inconsistency: restore from seed and verify balances on a separate node.
Don’t panic. Actually, wait—document your recovery steps before disaster hits. Having runbooks beats frantic Google searches at 2 a.m.
FAQ
Do I need to keep the node online 24/7?
For personal validation and support of the network, it’s best to keep it always-on. Short offline periods are fine, but long downtimes reduce peer connectivity and real-time data benefits. If you use Lightning, uptime matters more.
Can I run multiple nodes on one machine?
Yes, but resource isolation is critical. Use containers or VMs, allocate dedicated storage, and avoid shared data directories. Multiple nodes help testing and redundancy, but they multiply I/O and memory demands.
Is pruning safe for my use case?
Pruning is safe if you’re not relying on historical block data for rescans or analytics. It validates consensus fully but limits historical access. If unsure, start archival and migrate to pruning once you understand your workflows.
-
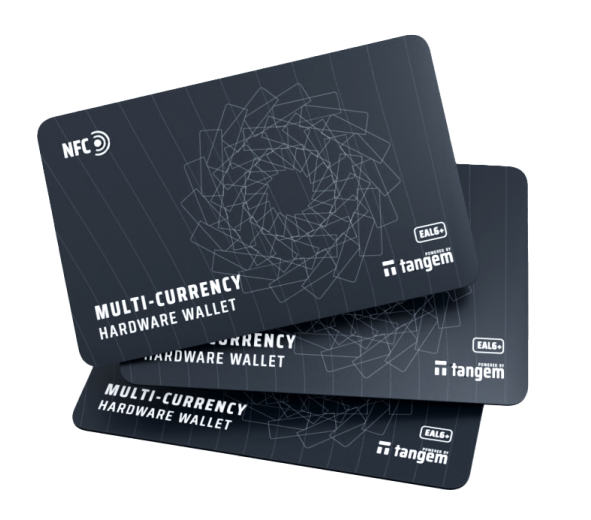
NFC Hardware Wallets: Why a Smart Card Might Be the Best Cold Storage You Haven’t Tried
Here’s the thing. NFC hardware wallets feel like such a small step, but they change the whole motion of storing crypto. I remember the first time I tapped a card and my jaw dropped; it was oddly satisfying. That gut reaction mattered because it made security feel tangible, like you could touch the concept and then lock it in a safe. Over time I started asking smarter questions about threat models, convenience trade-offs, and whether convenience would quietly erode safety.
Here’s the thing. A lot of people imagine cold storage as bulky devices or paper wallets, and they picture impractical rituals. Seriously? That’s changing fast with tiny NFC smart cards that hold private keys without needing a battery or constant firmware updates. My instinct said this would be gimmicky, but then I used one every day for a month and noticed the friction drop dramatically. On one hand the simplicity is brilliant, though actually there are nuanced risks that deserve attention—supply chain, physical theft, and the human tendency to misplace small items.
Here’s the thing. NFC eliminates cables and reduces attack surface because the private key never leaves the secure element embedded in the card. Hmm… that isolation alone reduces a whole class of remote attacks that plague HOT wallets. Initially I thought wireless meant less secure, but then I realized that short-range communication, if properly implemented and verified, can be safer than a USB port plugged into a compromised machine. The math is simple: fewer interfaces, fewer bugs, fewer ways for an attacker to touch your seed.
Here’s the thing. Usability shapes behavior; if a wallet is annoying people will do unsafe shortcuts like leaving keys on cloud notes or reusing weak passphrases. Whoa! That matters more than any cryptographic tweak. People want things that fit in a wallet and feel normal, and NFC cards mimic that form factor while still acting as real cold storage devices. So design choices that reduce friction without compromising the secure element are actually the most impactful improvements to real-world security.
Here’s the thing. Not all NFC cards are equal, and manufacturing provenance matters a lot. I’m biased, but supply chain integrity bugs me more than most folks admit. You can buy a beautiful-looking smart card that harbors compromised firmware if you source from dubious manufacturers. Actually, wait—let me rephrase that: the risk is present but manageable if you choose reputable products and verify provenance. On the technical side this means hardware-backed key generation and signed firmware, along with reproducible attestation methods to prove the device is genuine.
Here’s the thing. I keep one card in my daily carry and another in a safety deposit box—because I like redundancy and live in the real world where somethin’ gets lost. Hmm… redundancy is boring but necessary. There are elegant workflows where you generate a private key in a card, optionally back it up using a hardware passphrase or a multisig scheme, and then distribute backups in geographically separated, physically secure locations. That setup isn’t for everyone though; it’s more for people who treat crypto as long-term wealth or who manage funds professionally.
Here’s the thing. Interoperability with wallets matters more than shiny marketing copy. Seriously? A card that supports only one proprietary app is less valuable than one that follows open standards or has a clear API for integration. My instinct said vendor lock-in would be a problem, and indeed it can be, but some companies balance UX and standards well—offering app integrations and documented attestation so third parties can audit behavior. That level of openness gives you more choices and fewer single points of failure.
Here’s the thing. NFC’s short range is an advantage for security because you need proximity to interact, which cuts down the feasibility of remote exfiltration. Wow! Yet physical proximity also means physical threat—someone could snatch your card and coerce you. On one hand smart cards often support PINs or biometric wrappers, though actually biometric integration on tiny cards is still emerging and sometimes clunky. So threat modeling must include not just remote hackers but also pickpockets and coerced access; a well-rounded plan covers both.
Here’s the thing. Backup strategies vary, and each has trade-offs that are painfully human. Hmm… writing down a seed phrase on paper is cheap but fragile, while metal backups resist fire and water but cost money and feel extreme to set up. Initially I thought metal backups were overkill, but then a friend’s basement flooded and paper backups were ruined—so my view shifted. The practical middle ground for many is to use split backups (shamir or multisig reconciliations), combined with distributed physical storage to limit single-point loss risk.
Here’s the thing. Transaction verification flows differ across implementations, and that affects trust. Seriously? It’s subtle but important—if the app shows only a summary and you approve blindly, a malicious app or compromised host could mislead you about amounts or recipient addresses. My working rule now is to prefer cards and companion apps that show detailed transaction data on-device and require explicit confirmation steps that are hard to fake. That extra step slows you down a little, but it thwarts most phishing and host-level tampering attacks.
Here’s the thing. The integration story for NFC cards in mobile ecosystems is getting smoother, and that matters because people use phones for almost everything. Whoa! But platform fragmentation (Android vs iOS) creates uneven support, with Android typically offering more direct NFC access to third-party apps. I’m not 100% sure about every platform limitation, but it’s worth testing your intended workflow on your devices before relying on a particular card. Oh, and by the way, always update your phone OS and app from official stores to minimize host-side risk.
Here’s the thing. For custodial vs non-custodial choices, NFC cards tilt the balance toward true non-custodial control without the clunk of legacy cold-storage methods. Hmm… control feels different when you can tap and sign across multiple wallets while keeping keys offline. On the other hand, if you want instant recovery for high-frequency trading, a custodial solution still wins on convenience—so choose based on your priorities and threat tolerance. Personally I value sovereignty and resilience more than ultra-low latency access, but that’s an opinion, not a one-size rule.
Here’s the thing. Auditing and third-party review are the keys to trustworthiness in this space. Seriously? You should look for devices with public security audits, reproducible builds, and documented attestation mechanisms that let you verify the card’s authenticity. Initially I thought vendor claims were enough, but I’ve changed my mind after digging into source code and auditor reports. Companies that open their processes tend to catch bugs earlier and build trust faster—so favor transparency.
A practical workflow I use (and recommend)
Here’s the thing. I generate keys on the card and never export them, and I pair the card with my phone only when necessary. Hmm… this means the private key remains in hardware, and signing happens over NFC with explicit prompts. For everyday checks I use a read-only watch app, but for signing I physically present the card and confirm on-device. I also keep a certified backup in a separate location (and yes, I double-check it annually), and that small habit saves a lot of panic later on.
Here’s the thing. If you’re shopping for a card, check for secure element provenance, clear attestation, and a track record of security response. I’ll be honest: a slick user interface is nice, but the underlying hardware and supply chain verify the security. A pragmatic example I like is the tangem card—it’s a thin, NFC hardware wallet that balances real-world convenience with a hardware-secure element and straightforward UX, and you can read more about it here: tangem. That single link will give you product info and start points for deeper research.
Common questions
Is NFC secure enough for long-term cold storage?
Here’s the thing. NFC itself is just a communication channel and short range helps security, but long-term safety depends on hardware quality, attestation features, and your personal backup habits. Hmm… use cards with a secure element, verify supply chain integrity, and plan for physical redundancy. That combination covers most realistic long-term threats.
Can someone clone or skim my card?
Here’s the thing. Properly implemented smart cards resist cloning because the private key never leaves the secure element, and NFC skimming over very short ranges is limited by design. Whoa! Physical proximity and lack of key exportability make cloning impractical in many popular devices, though you should still treat your card like cash. Keep it safe, and use a PIN if available.
-
Why Solscan Became My Go-To NFT Tracker on Solana (and How I Use It)
Whoa! I remember the first time I chased a mint on Solana and felt totally lost. It was messy then; I had wallets, jumpy markets, and a half-remembered link. My instinct said there had to be a single place to see what actually happened on-chain — not the rumor, not the Twitter thread, but the raw receipts. Initially I thought the default explorers would be enough, but then I realized they left out context that matters for NFT tracking: holder flows, mint anomalies, and quick collection-level snapshots. Actually, wait—let me rephrase that: explorers showed the data, but not in the way I needed when deadlines and gas spikes hit.
Solscan grew on me because it stitches together small things that save time. Seriously? Yes. The UI pulls transactions, token metadata, price history, and holder distributions into one view. Hmm… that convenience matters when you’re doing research fast or when you need to call out a suspicious transfer to a client. I’m biased, but for NFT work it’s very very practical: clear token pages, fast search, and good filtering tools. Here’s what bugs me about some alternatives — they’re either too clunky or too shallow — and Solscan sits in a sweet spot between raw power and usable design.
At a glance, the NFT workflow I use looks like this: find the mint address, open the token page, scan the holder list and recent transfers, then check the transaction details for signature and program interactions. Short and blunt. That sequence helps me answer three quick questions: who holds it, where did it come from, and did any weird program calls happen during minting. On one hand it sounds simple; though actually the devil’s in the details — metadata mismatches, wrapped tokens, and phantom transfers can throw you off. Somethin’ like a gag in a movie — you think you saw it, but then there’s another layer.
Hands-on tips (real-world use)
When I’m tracking an NFT collection I often start at the collection or mint address and then open the token’s transaction history. If you want the fast path, use the search box for the mint ID and then skim these sections: Transfers, Holders, and Activity. A couple of quick pro moves: export the holder list for CSV if you want to run nicer analytics, and watch the “Verify metadata” or off-chain link to confirm the media origin. I bookmarked the solscan explorer official site because it’s become my reference page for quick lookups and the occasional deep dive.
One time I tracked a suspicious airdrop. It looked like a legit distribution, but the holder list showed a tiny cluster moving pieces between 10 addresses before landing in a marketplace. My gut said pump-and-dump. Initially I thought it was a simple mint-to-market flow, but then realized the pattern repeated across multiple mints. That pattern recognition came from eyeballing holder concentration and transfer timing — stuff you can spot on Solscan if you know where to look. (Oh, and by the way… I flagged it to the project and they thanked me later.)
For collectors: check the “Holders” tab for concentration risk. If 80% of a collection is held by 3 wallets, the price floor is fragile. For traders: use the “Recent Transactions” with program-level detail to see if bots were involved in the mint. For researchers: export data and run quick metrics — I like to compute Gini coefficients on ownership distributions for a rough health check.
Here’s a quick checklist I follow when verifying an NFT drop:
- Confirm the mint address and token metadata (URI checks out).
- Scan initial transactions for involved programs (was there an unusual program id?).
- Look at holder distribution within first 24–48 hours.
- Check for immediate listings on marketplaces; watch for quick flips.
- Export data when you need offline analysis or to run scripts.
Now, some caveats. On-chain explorers show on-chain truth, but that doesn’t equal legal ownership in the off-chain sense, and it doesn’t reveal private agreements. Also, metadata can be swapped or hosted off-chain, so the link might break or be intentionally misleading. I’m not 100% sure about the long-term guarantees of any off-chain host, so I usually screenshot important evidence when I file a report. That part bugs me — we rely on web hosts that can vanish.
For builders: Solscan’s program logs and transaction parsing are handy when debugging contract interactions. If your program behaves unexpectedly during minting, you can trace the exact instruction set and see which CPI calls happened. If you’re a dev and you saw a weird failed transaction, check the logs field; it often tells you the exact program error. Initially I thought smarter dev tools were needed, but this often suffices for triage. Seriously, it cuts down on the back-and-forth with ops teams.
Another thing I like — and use often — is the token holder history timeline. It lets you see when major wallets moved in or out. If a whale dumps into the market, you’ll spot the transfer and then correlate to listings. If you’re watching for wash trading or circular trading, the pattern of repeated transfers among a small group is the giveaway.
Practical example for suspicious transfer tracing: copy a wallet address, paste it into the explorer, then use the “Transactions” filter for “Transfers” and sort by recent. Follow the chain back if needed — sometimes tokens were wrapped/unwrapped or routed through an intermediary program. That chaining is how shady flows hide. Hmm… it takes a little patience but it works. I’m biased, but learning to read signatures and program ids is an essential skill in this space.
Common mistakes and how to avoid them
Relying only on off-chain marketplace listings. Don’t. Marketplaces can mislabel tokens or cache broken metadata. Checking the on-chain mint and metadata is simple and it avoids embarrassment. Mistaking the verified check for absolute authenticity. The checks help but they are not bulletproof. Assuming every holder is a unique person. Bots and multisigs skew distribution; dig into token transfer patterns before you claim decentralization.
Also—small practical tip—use browser bookmarks for frequent mints and keep a spreadsheet of suspicious signatures. Seriously, it helps later when you need to build a timeline for a report. The little mundane rituals matter. In my experience, repeatable processes beat heroic one-offs every time.
FAQ
Can Solscan show the original minter and the metadata source?
Yes. The token page typically includes the token mint, creation transaction, and the metadata URI (off-chain). You’ll see who signed the mint transaction and the programs involved. That gives you a reliable on-chain trail to follow.
Is it safe to rely on Solscan for legal evidence?
Solscan shows on-chain events, which are immutable. Still, you might want to capture screenshots and export CSVs for record-keeping, because off-chain metadata can change and third-party displays vary. For formal disputes, pair on-chain evidence with timestamps and independent witnesses.
What’s one trick every NFT tracker should know?
Pay attention to holder concentration and the timing of transfers. A sudden cluster of transfers right after mint often indicates bot activity. Pair that observation with program logs and you can often tell if the event was organic or orchestrated.
-
How I Read Token Markets: Practical Tricks for Tracking Pairs, Price, and Volume
Whoa, prices flip quickly.
I was watching a tiny token hit insane volume yesterday. At first I thought it was just a pump. The order books on DEXs were thin but noisy. Eventually I dug into the trading pairs, cross-checked price feeds and volume spikes, and realized that liquidity was migrating between pairs in a way that fooled basic trackers.
Seriously? This happens more than you think.
My instinct said “watch the pair, not the coin name.” Initially I thought volume alone was the clearest signal, but then I realized that volume can be stove-piped across spin pairs to create illusions. Actually, wait—let me rephrase that: on one hand raw volume spikes matter, though actually you need context like depth and pair composition to trust the signal.
Here’s the thing.
Check the base token. Look at whether most trades are against a stablecoin or a volatile asset like ETH or BNB. Stablecoin pairs often better reflect real fiat-driven demand, while volatile-pair volume can be high but misleading. Watch price impact too—big reported volume with 20% average price impact screams thin liquidity to me. I’m biased, but that part bugs me when people paste volume numbers without context.
Hmm… somethin’ else to watch.
Liquidity movement is subtle. Follow the LP tokens and look for sudden burns or withdrawals. If a pool’s TVL collapses while trades keep printing, that’s a red flag—funds can be pulled and the price pumped right after. On a practical level I open two windows: one for the pair pool and one for the broader token metrics, toggling between them like a trader with ADHD.

How I use on-chain and off-chain signals (and a quick tool tip)
Okay, so check this out—use both on-chain pool data and DEX aggregator feeds to triangulate price. I often start by scanning pair charts and liquidity depth, then cross-validate with order-level data and block explorers. When I need a fast surface-level read, I’ll pop into a token tracker and look for mismatches between pair volumes and actual swap events. For more hands-on checking, look up the pairs on a reputable scanner and compare their 24h volume, but don’t be lazy—click through the biggest swaps and see who moved what.
When you’re ready for a single-click gateway to get those pair snapshots, try this tool — you can find it here — it helps me eyeball pair health quickly without drowning in raw logs.
Hmm, let me walk you through a simple checklist.
1) Identify the top 3 pairs by volume. 2) Check the pool TVL and recent LP token events. 3) Look at price impact for common trade sizes. 4) Flag large single-account swaps in the last 24 hours. Those steps combined give you a pretty clear sense of whether volume is organic or engineered. On paper it’s easy, though in practice you have to flip between analytics panels and raw blocks, which gets tedious but it’s worth the time.
Whoa, the nuance matters.
Watch slippage on both sides of a trade. High bid-ask spread or asymmetric slippage often signals that sellers and buyers are not symmetric, which can mean a whale is filtering exits. Also track pair age—newly created pools are playgrounds for crafty schemes. I’m not 100% sure of every pattern, but repeated observations taught me that new pools with odd tokenomics and sudden liquidity inflows deserve skepticism.
Really? Yeah, seriously.
Volume normalization is another trick I use—adjust volume relative to pool depth and circulating supply. A million dollars of volume in a pool with $50k TVL is much more meaningful than the same volume in a pool with $10M. I often compute a simple ratio: 24h volume divided by pool TVL, and when that number spikes above a certain threshold (which I calibrate per chain) I start digging deeper. Initially I thought a single threshold fit all chains, but different ecosystems behave differently, so tailor your numbers.
Here’s a practical red-team approach.
Simulate the trade you might make and see the expected price impact. If your test trade moves price by more than you can stomach, the pair isn’t safe to use for anything other than small scalps or sniping. Also monitor the token’s tax and transfer mechanics (if any), because those can appear as fake volume or hidden sinks. On one hand these factors are tedious to check, though on the other they save you from very bad mornings.
Whoa, anecdote time.
I once chased a token that showed huge volume on a volatile pair and nearly got rekt when the LP was pulled mid-session. My gut said “something felt off about the order sizing,” but I leaned into FOMO anyway. Lesson learned: go slowly when you feel rushed; that adrenaline is often the market’s friend, not yours.
Okay, trade sizing and recovery tips.
Always size trades to the liquidity profile, not your account balance. Use limit orders when possible and stagger exits to reduce impact. If you detect a sudden LP removal, don’t panic-sell; consider stop-limit or partial exits into stable assets. I’m not a financial advisor—just someone who trades a lot and hates toast that got burned because I was careless.
Common trader questions
How do I tell real volume from fake volume?
Compare on-chain swap events with reported exchange volumes, check for repetitive wallet patterns, and normalize volume by pool TVL; if you see repeated wash trades between a handful of addresses, treat that volume as suspect.
Which pair should I prefer for execution?
Prefer stablecoin pairs with deep TVL for large trades, and use volatile-pair liquidity only for small trades or arbitrage where you can absorb slippage. Also scan for recent LP activity and look at trade depth for your intended trade size.
-
Why I Keep Coming Back to Bybit: Download, App, and Derivatives Notes from the Desk
Whoa! The first time I tried Bybit on my phone I was annoyed and intrigued at the same time. The app loaded fast. It felt like a real trading terminal squeezed into a pocket; clean, responsive, but with some quirks that made me squint. Initially I thought mobile derivatives trading would be slapdash and risky, but then realized the tooling has matured faster than most people expected—so you do need a plan, not just a tap-and-hope strategy.
Okay, so check this out—app installation is easy. Two taps on a store and you’re there. Seriously? Yes, though you should verify sources and permissions. I’m biased, but habitually I go through a couple of checks before I download any trading app: permissions, reviews, and support response time. Something felt off about a different app last year, somethin’ small, but it cost a headache—so take your time.
Here’s the thing. For derivatives traders, latency and interface matter. Medium delays can cost a position. Longer delays, or confusing risk labels, can tank your P&L quickly when leverage is involved, though actually wait—let me rephrase that: it’s not just speed, it’s the blend of clarity and speed that counts. On one hand you want advanced order types and quick charting. On the other hand, too many features shoved into tiny screens makes mistakes more likely.
Download tips first. Use official sources. If you’re on mobile, head to the app store for iOS or the Play Store for Android if available in your region. If you prefer a web-based route, bookmark the exchange and confirm SSL and domain details every time. And hey—if you’re new and want a reminder link for the official portal, check this resource: bybit official site login. I mention that because phishing is real; scams look slick.

Getting comfortable with the app and download process
Hmm… the first week on any derivatives platform feels like learning to ride a bike again. You wobble. You overcorrect. Then something clicks. My instinct said keep leverage low at first, and that advice held up. Initially I relied only on market orders. But after a few trades and some embarrassment, I learned limit, conditional, and reduce-only order types—those saved me more than once.
Set up two-factor authentication immediately. Use an authenticator app rather than SMS, if you can. It’s faster and less prone to SIM swap hacks—SIM swaps are nothing to sneeze at. Also, use a strong, unique password and consider a password manager. I know, I know—you hate another app to install. But trust me, the alternative is much worse.
Derivatives basics in practice. Perpetual contracts dominate the volume. They fund via a periodic fee between longs and shorts, which nudges price toward the index. That funding rate can be your friend or enemy. When the rate spikes, it signals crowding and potential pain ahead, but it’s not a sole timing tool. On the bright side, Bybit’s UI shows funding clearly. On the not-so-bright side, human nature pushes traders to ignore that clarity when FOMO hits—been there, done that.
Margin modes matter. Isolated versus cross margin changes risk behavior. Isolated lets you stake a single position without wiping your account. Cross shares margin across positions, which can prevent liquidation in some cases but also amplifies correlated risk. Initially I thought cross was safety net; then I realized—hold up—it’s also a trap if you overleverage across multiple correlated trades. Balance your risk sizing.
Fees and liquidity. Fees are competitive, but the devil is in maker-taker differences and funding schedules. If you scalp, maker rebates can help. If you swing, funding costs add up over weeks. Liquidity depth varies by pair and time of day; for US users, major pairs (BTC, ETH) have deep books most hours, though weekends can be weird. Also, be aware of settlement cycles for quarterly products if you trade those—stuff changes at expiry.
Product mix on the app. You get perpetuals, inverse contracts, options in some regions, and spot. The transition between spot and derivatives in the app is smooth, yet cognitive load rises when switching mentally between the two because P&L math differs. I tend to keep separate mental ledgers for spot HODL and derivatives plays—call me old-school. (oh, and by the way…) UI shortcuts help; set up watchlists and quick order presets so you don’t fumble when the market moves.
Risk controls that matter. Use stop-losses and take-profits. Use reduce-only flags on exits if the platform supports it. The app will often warn about margin and liquidation levels; read them. It’s tempting to dismiss the warnings, especially when you’re on a roll, but those little alerts have saved me from blowing accounts. Not always, but sometimes… and that matters.
Customer support and trust. Bybit offers live chat and help docs. Response times vary. If you’re moving sizable funds, test support with a low-stakes question first—see how they treat you. My take: exchanges are great until there’s an outage or a market freakout. Then you learn who responds and who ducks. Evaluate support before you go big.
FAQ
Is the Bybit app safe to use?
It’s reasonably safe when you follow best practices: official download sources, strong passwords, two-factor auth, and careful fund sizing. No exchange is perfectly safe, so custody strategy matters—keep long-term holdings in cold storage when possible.
What about learning derivatives on mobile?
Mobile is fine for monitoring and quick trades, but for heavy analysis use a desktop. Charts and multi-timeframe analysis are easier on larger screens. That said, Bybit’s mobile charting is impressive—just adapt your workflow to the device.
How do funding rates affect my trades?
Funding rates are a recurring cost or credit for holding positions. High rates suggest crowding and can erode swing profits. Use rates as a sentiment check, not a sole signal.
-
Why a Lightweight Monero Wallet Makes Sense (and When to Be Careful)
Okay, so check this out—I’ve been messing with Monero wallets for years. Wow! The lightweight web wallets are fast, convenient, and often the easiest on-ramp for people who want privacy without running a full node. But there’s nuance here. My instinct said “use the simplest tool,” though actually, wait—there are tradeoffs you should frankly know before you click anything. Something felt off about recommending wallets flat-out, so I kept poking around until the tradeoffs felt clear.
First off: what do I mean by a “lightweight” Monero wallet? Short answer: it’s a wallet that doesn’t require you to download and store the entire Monero blockchain. Longer answer: instead of syncing every block, the wallet queries a remote service (a remote node or a view-server) to fetch transactions related to your address while keeping key material on your device.
Seriously? Yes. The convenience is that you can be up and running in minutes. But remember—convenience often comes with compromises. On one hand, lightweight wallets hand you quick access; on the other hand, they sometimes involve trusting external infrastructure for parts of your privacy or history visibility.

How Web-Based Lightweight Wallets Work (High-Level)
Light wallets use two main tricks. One: they keep your private keys on your device and do cryptographic work client-side. Two: they outsource blockchain scanning to a remote node or to an indexed service that can search the chain for outputs belonging to your account. MyMonero popularized a browser-friendly approach where the heavy lifting of scanning is remote while your spend key remains local. On the plus side, you get a sleek UI and low resource use. On the minus side, that remote service learns when you check your balance (and potentially other metadata).
Here’s the thing. Metadata matters. Even if the wallet doesn’t have your spend key, repeated queries from the same IP (or same account on a server) can reveal patterns. Hmm… that surprised a few people when they first dug into it. Initially I thought the only risk was a stolen seed, but then I realized traffic and query-pattern leaks are real-world vectors too.
Practical Pros and Cons
Pros first: lightweight wallets are fast, easy, and low friction. They let you move Monero from your phone or browser without CPU or disk drama. They’re great for small, everyday transactions—buying a coffee, testing a new marketplace, transferring a modest amount to a friend. They’re also ideal for folks who aren’t comfortable running a node.
Cons: you sometimes place trust in a server or service operator (or their infrastructure). That can affect privacy because nodes can log IPs and request timing. Also, browser environments have additional attack surfaces—malicious browser extensions, sketchy public Wi‑Fi, or social-engineering phishing pages. So, guardrail advice: use lightweight wallets for convenience and smaller balances; for large sums, consider adding a non-custodial hardware wallet or using a full-node wallet.
Is MyMonero a Good Choice?
I’ve used MyMonero—both the official client and similar light solutions—over the years. It’s slick. If you want a quick Web login, you can try an entry point like https://my-monero-wallet-web-login.at/ and get going fast. But I’ll be honest: always verify the URL and make sure you’re on the legitimate site. Phishing is a thing—very real—and attackers clone wallets to harvest seeds. My rule: small amounts and testing on web wallets; move serious funds to cold storage or a full-node-managed wallet.
On a related note: use strong, unique passwords, and back up your mnemonic seed in multiple secure places (paper, encrypted drive, hardware wallet backup). Don’t screenshot your seed and stash it on a cloud service without encryption—yeah, that part bugs me.
Privacy Tips that Actually Help
1) Use a trusted remote node only if you understand what metadata you might leak. If possible, use nodes over Tor or a trusted VPN. 2) Seed backups: write them down offline, test the restore occasionally on a throwaway device. 3) For recurring or larger transfers, prefer a full-node wallet or a hardware wallet paired with a remote node you control. 4) Keep your browser lean—disable extensions when using a web wallet, or use a fresh profile. Sounds like overkill? Maybe. But I’m biased: I like predictable risks.
On one hand, web wallets democratize privacy by lowering the technical barrier. On the other hand, they centralize queries. Though actually, you can mitigate some of that centralization by using different nodes for different sessions, or by running your own remote node if you have resources. Tradeoffs. Tradeoffs.
FAQ — Quick Questions People Ask
Is a web-based Monero wallet safe enough for daily use?
Yes for small daily amounts. No for long-term storage of large sums. Use web wallets for convenience and low-risk transactions; keep savings in cold storage or in a non-custodial full-node setup.
What happens if the web wallet server goes down?
Usually nothing irreversible: your keys are client-side, so you still own the funds. But you may lose easy access until you can connect to another node or restore your seed in a different wallet. Backup your seed and practice restores.
Should I use Tor or VPN with a lightweight wallet?
Yes—Tor is a strong way to reduce IP-based linking, though it can slow things down. A reputable VPN helps too. Don’t rely on these as a cure-all; they’re one piece of a layered privacy approach.
How do I verify I’m on the real MyMonero site?
Check the URL carefully, verify HTTPS, and if available, compare the site’s fingerprint or PGP signature against official channels. If you’re not 100% sure, don’t paste your seed—test with a small amount first.
-
Why your Cosmos keys deserve better: a practical guide to private key management and hardware wallets
Okay, so check this out—I’ve been noodling on key management in the Cosmos world for years. Really. My instinct always said somethin’ was off when people treated keys like disposable strings of characters. Wow! At first it felt like crypto folks were either paranoid or totally apathetic. Then I started losing sleep over avoidable mistakes, and the picture changed.
Here’s the thing. Private keys are the secret sauce that controls your staking, your IBC transfers, your on-chain identity. Mess them up and you don’t get sympathy—you’re just out. Seriously? Yep. On one hand people love the control that self-custody gives them; on the other hand, many users parachute into Cosmos with wallets that make recovery awkward, or they keep keys on devices that are… let’s say not ideal.
I’ve moved funds between multiple zones, experimented with ledger flows, and yes I once almost messed up a mnemonic export because I was in a hurry—classic rookie move. My gut said “store it offline,” but actually, wait—let me rephrase that. Storing offline is necessary, but it’s not sufficient. There are layers: creation, backup, signing, and lifecycle handling. And each layer has easy traps.
Short version: treat private keys like the master key to your house and car, not like a password you can reset. Hmm… that sounds dramatic but it’s true.

Where people trip up (and fast)
Most mistakes are painfully ordinary. People write seed phrases on sticky notes and post them in drawers with bank statements. Some type them into cloud notes because “it’s convenient.” Others scramble the derivation path when adding a chain and later blame the wallet. There’s a pattern: convenience wins over security until the moment it doesn’t. My experience says: convenience isn’t neutral—it’s a vector.
Why? Because Cosmos is multi-chain by design. IBC means you move tokens between chains. If one chain demands a particular address format or derivation path, and you used a wallet that abstracts that away, you’ll be fine most of the time—until you’re not. And when you’re not, recovery becomes painful. You might have a mnemonic, but the right derivation and address prefix matter. So backups must be thought through.
Something felt off about one popular workflow: create a mnemonic on a phone, back it up to an encrypted file, forget the passphrase. Yep—been there. You can avoid this by separating the creation device from the signing device and treating a hardware wallet as the root of trust.
Hardware wallets: why they matter (and how they actually help)
Hardware wallets force the signing operation into a tamper-resistant environment. Simple. They keep your private key off general-purpose devices. They also give you a clear recovery path: a seed phrase written on paper (or a steel plate if you’re fancy). But there’s nuance. Not all hardware integrations are equal. Some wallets only support basic Cosmos chains; some expose advanced signing options. And user flows can be confusing—especially when you pair a hardware device with a browser extension or mobile app.
Here’s an anecdote: I connected a hardware key to a browser wallet and thought everything was locked down. Then I realized the browser still held metadata and transaction previews could be spoofed in some edge cases. I updated firmware, changed settings, and learned that hardware plus careful UX is the combo you actually want.
Okay, so check this out—if you’re in the Cosmos ecosystem, using a well-integrated wallet that understands IBC, staking, and chain-specific nuances matters. For me, keplr wallet felt like the best trade-off between usability and control; it supports a wide range of Cosmos zones and pairs with hardware keys for secure signing. You can try it at keplr wallet. I’m biased, but I like that flow: browser convenience while signing on-device. Still, do your own testing.
Practical key-management checklist
Alright, here’s a working checklist—practical, not academic. Use it as a simple mental model.
1) Generation: create your seed on an air-gapped or hardware device. Don’t type it into a connected laptop. Simple, but it gets ignored a lot.
2) Backups: use two copies: one paper (or steel) in a physically separate location, one sealed backup in a different place. Don’t store both in the same fireproof box. Also—consider passphrase (25th word) strategies carefully; it’s a powerful safeguard but easy to lose.
3) Device hygiene: keep firmware up to date on hardware devices; update companion apps, but verify updates from official sources. Phishing is real. On that note—never export private keys to random software.
4) Derivation awareness: when you recover with another wallet, check derivation paths and address prefixes. Cosmos chains often use the same base but different bech32 prefixes—this trips up recoveries. And yes, I had to remind a new validator about that once—embarrassing for them, educational for me.
5) Least privilege: give apps the smallest scope needed. If a dApp requests staking delegation permissions, you can often limit approvals. Use the wallet’s confirmation prompts—read them instead of auto-approving. Seriously. It matters.
6) Rotation and lifecycle: move large sums to new keys periodically. Rotate keys if you suspect any exposure. Not every user needs monthly rotation, but think in terms of risk thresholds.
Signing flows: hardware + app patterns that work
There are a few patterns that I find reliable. I’ll walk through them in plain terms.
Pattern A: hardware-only creation, local signing for high-value ops. Create the seed on the hardware. Use a companion app or extension that never asks for the private key. Signing prompts appear on-device and show transaction details. This is gold for validators and large delegators.
Pattern B: mixed workflow for frequent day-to-day moves. Use a curated hot wallet for small amounts and a hardware-backed cold wallet for large balances. Move funds between them with deliberate transfers. It’s a little more work but far safer.
Pattern C: multisig for shared custody. For teams or DAOs, using a multisig with distributed cosigners reduces single-point-of-failure risk. Yes, multisig brings UX friction, but the security trade-off is worthwhile for significant treasuries.
Each pattern assumes you pay attention to transaction previews. Hardware wallets mitigate many risks, but social engineering still gets people. A human can be tricked into approving a malicious action because the prompt looked normal—or because they were interrupted. So don’t—um—approve while distracted. I’ve done that; not proud.
Common questions I get
Q: Can I rely solely on a mobile wallet for Cosmos IBC transfers?
A: For small amounts, yes. For larger sums or staking delegations, I recommend pairing with a hardware wallet. Mobile wallets are convenient but more exposed to malware and backups that are easy to mishandle. Also, make sure any mobile wallet supports the derivation/address formats of the zones you use—it’s not always automatic.
Q: What about using a passphrase (the 25th word)?
A: It’s powerful; it effectively creates a new account derived from the same seed. But it’s a double-edged sword—lose the passphrase and you lose access with no recovery. I use it for high-value accounts while maintaining a separate, simpler recovery for everyday use. Balance convenience and security to your threat model.
Q: How do I recover if I only have a mnemonic and a different wallet app?
A: You can usually import the mnemonic, but you’ll need to ensure the derivation path and bech32 prefix match the chain’s expectations. If addresses don’t show up, adjust derivation or try alternate import options. And yes, this is why I recommend testing your backup recovery in a low-stakes environment—practice the process before you actually need it.
Look—I won’t pretend there’s a one-size-fits-all answer. On one hand, total paranoia is exhausting; on the other hand, casual saving is careless. My working baseline: use hardware for keys that matter, separate hot and cold balances, test your recovery, and document your process so a trusted person can help if needed (oh, and encrypt any written instructions you keep digitally).
Something I keep repeating to folks at events: the technology is getting friendlier, but human habits are still the weakest link. That part bugs me. People spend hours optimizing yield curves but a sticky note with their seed phrase sits in a kitchen drawer. Weird priorities, right?
Final nudge—if you’re serious about Cosmos and IBC, step up your key hygiene this week. Buy a reputable hardware device, test the pairing, write down recovery seeds, and run a mock recovery. It won’t be fun, but it’s worth the peace of mind. Seriously, do it now—your future self will thank you.
-
Why Smart Contract Verification and Gas Tracking Actually Matter (and How to Do Them Right)
Whoa! This whole verification thing can feel like magic or witchcraft. Most developers nod along when someone says “verify your contract,” but few understand what that actually means under the hood. Initially I thought it was just about pasting source code into a form, but that view is way too simplistic, and here’s how the pieces really fit together. My goal below is practical, US-centric, and a little blunt—because this part of the stack is where trust either gets built or burned.
Seriously? Yep. Verification is the bridge between opaque bytecode and human-readable source. It maps compiled bytecode to a specific compiler version, optimization settings, and source files so anyone can reproduce the binary on-chain. On one hand verification is paperwork—on the other hand it’s crucial forensic data when money is involved, and yes, it matters for audits and user trust. If the on-chain bytes don’t match the published source, alarms should go off, though actually those mismatches sometimes come from innocent settings errors.
Hmm… somethin’ to keep in mind: explorers (the tools people use to inspect blocks and contracts) usually show “verified” when metadata lines up, but that label hides nuance. The explorer compares your bytecode to a reconstruction built from the uploaded source and metadata; if the hashes match, you get the green check. That green check increases transparency dramatically, because wallets and dapps can display the ABI, readable functions, and even constructor args—very very useful. But the caveats below are what trips teams up.
Okay, so check this out—I’ll walk you through the most common verification pain points and the step-by-step fixes. Then we cover gas tracking and practical tips for estimating cost and avoiding stuck transactions. I won’t pretend this is exhaustive; think of it as a field guide for devs who ship contracts and users who want to vet them.

Smart Contract Verification: What to Watch For
First, know the core ingredients for verification: exact compiler version, optimization flag and runs, solidity files in the right order, and matching constructor parameters. If any of those differ, the reconstructed bytecode won’t match the chain’s bytes. A common trap is using a different minor compiler patch—0.8.9 vs 0.8.9+commit—enough to break comparisons sometimes. Another subtle issue is library linking; unresolved library addresses will change the deployed bytecode unless you link them exactly.
Here’s a short checklist to avoid headaches: include SPDX license tags, include the metadata hash, keep file paths consistent, and—this is a big one—use the exact optimization runs you compiled with. For multi-file projects, flattened sources sometimes work, but many verification UIs prefer the entire file tree and metadata blob. If you publish via an automated pipeline, emit the metadata.json and the sources together so the explorer can reconstruct deterministically.
I’ll be honest: the verification UIs on explorers try hard, but they can be picky. Some teams automate verification through APIs, and that usually beats copy-paste. If your CI stores the compiler version and metadata alongside artifacts, verification becomes reproducible and less stressful. On the other hand, manual steps almost always invite error—so automate where feasible.
Something that bugs me is how often constructor arguments are left out or encoded incorrectly. When a contract is created with constructor parameters, those args are part of the creation code. If you don’t provide the correct ABI-encoded constructor parameters, the reconstructed bytecode won’t match. Many explorers offer a field to paste encoded constructor data; use it. If you’re unsure, re-derive the encoding from the ABI using a reliable library.
On the unusual side: some contracts embed immutable variables or off-chain metadata pointers which change the deployed bytes depending on build-time input. In those cases, verification still works, but you must supply the same build inputs. It’s granular, and it forces teams to version their builds more carefully, which is actually healthy.
Where Etherscan Fits In
For folks who want a familiar, practical interface, etherscan provides a widely used verification flow and a clear “verified” indicator. If you want to try verifying manually or via API, the explorer’s UI and backend support the standard matching steps. If you need the form, look up the “Contract” tab and follow the prompts; if you prefer automation, their API is useful for CI-based verification. You can find the explorer here: etherscan.
Note: only use that one link above—most teams rely on a single trusted explorer and avoid confusion by sticking with it. That link leads to the verification and contract inspection tools, which are widely used in the Ethereum community and recognized by many wallets and analytics providers.
Gas Tracking and Transaction Economics
Gas trackers are deceptively simple on the surface. They usually show current base fee, recommended priority fees, and historical gas usage by block. But interpretation matters: gas limit, gas used, base fee, max fee, and priority fee all interact in ways that bite first-time senders. If you set a max fee too low under EIP-1559, your transaction may never be included. If the priority fee is too low, miners might deprioritize you during congestion.
Practically: read the mempool and recent blocks—watching the gas tracker for 10-15 minutes often gives a better sense of what a competitive tip looks like. If a token launch or NFT mint is imminent, expect spikes and plan accordingly. Also, watch out for nonce gaps—stuck low-fee transactions can block a chain of dependent transactions. Replacing via a new tx with the same nonce and higher fee usually fixes things.
Another practical tip: estimated gas used versus gas limit matters. Setting the gas limit too tight causes out-of-gas reverts; setting it excessively high is fine for EVM but may hide inefficiency. Always estimate via an RPC call before sending complex contract interactions. And when you’re debugging on a testnet, verify that gas costs are similar on mainnet—sometimes optimizations change runtime cost slightly.
FAQ
How long does verification take?
Most verifications are immediate, but complex projects or queued API requests can take a few minutes. If the explorer has trouble reconstructing metadata, expect manual intervention.
What if my contract fails verification?
Check compiler version, optimization settings, library linking, and constructor encoding. If all else fails, re-export the metadata.json from your build system and use that with the exact source files.
Can I verify proxies and implementation contracts?
Yes—but proxies complicate things. Verify both implementation and proxy, and if the proxy uses immutable addresses or call-data forwarding, document the linkage clearly. Some explorers offer proxy verification helpers; use them.
-
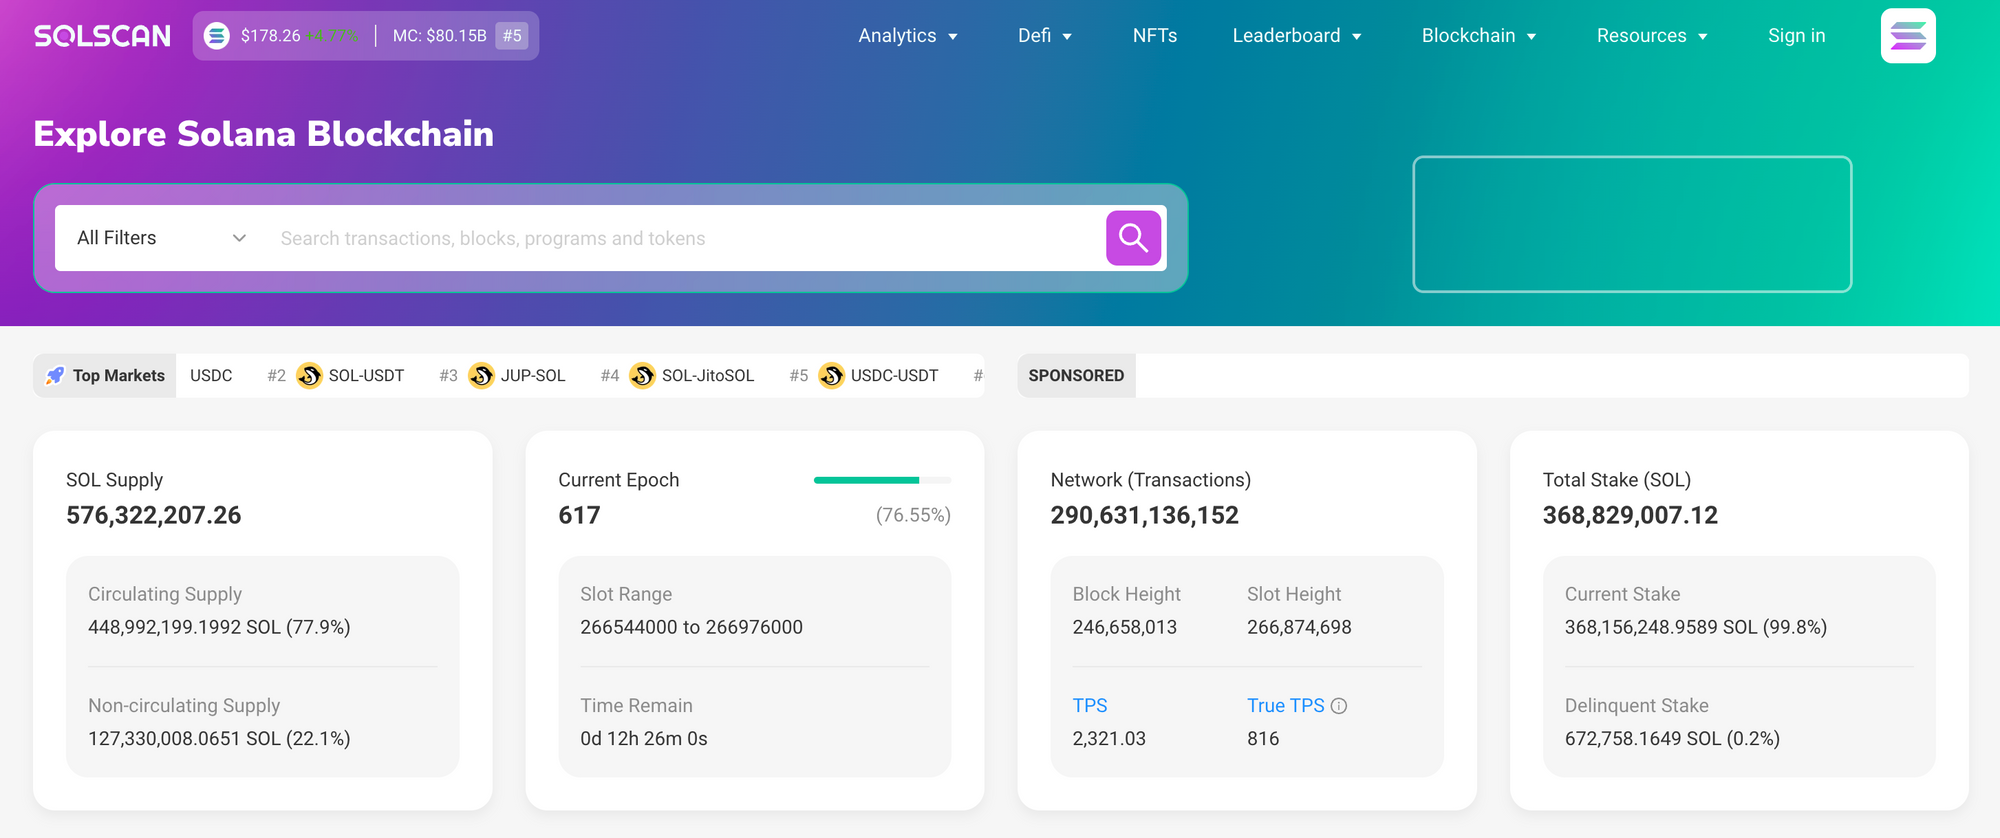
Reading the Solana Ledger Like a Human: Practical Solana Analytics and SPL Token Hunting
Wow! I was staring at a messy tx history the other day and it felt like reading someone else’s receipts. The first look was chaotic, with dozens of signature rows and program IDs that meant little without context. Initially I thought I could patch together the story from RPC calls alone, but then realized that a visual explorer and targeted analytics change everything. Longer dives—where you stitch token mint data to account activity and to program logs—are where the real answers live, though getting there takes patience and somethin’ of a method.
Whoa! Tracking SPL tokens is deceptively simple on the surface. Many folks think “token transfer” and move on, but actually those transfers often hide authority changes, metadata updates, or wrapped SOL conversions. My instinct said look for the mint address first, and that tip saved me more than once; the mint is the fingerprint that survives weird account renames and vanity labels. On one hand a token may look like a dozen transfers; on the other hand those transfers could be the same holder cycling tokens through intermediary accounts to obscure provenance (ugh, that part bugs me). If you follow the mint and associated metadata you avoid chasing shadows, which is vital when you have to audit quickly.
Really? Yeah, really—logs matter. Short note: program logs and inner instructions are where intent is recorded, and sometimes they contradict what the top-level instruction suggests. Initially I thought transaction summaries were enough for debugging, but then I started reading inner instruction payloads and realized I was missing failed CPI calls and retries. That subtlety is critical when debugging complex Serum or Raydium interactions, especially when multiple CPIs change token balances in ways that the top-level instruction abstracted away. So, read the logs; they often explain why a swap reverted or why a balance drifted, even though on paper everything looked normal.
Hmm… here’s the thing. You can do a lot with RPC endpoints, but the tooling layer—indexers, explorers, and curated UIs—saves developers hours. I’ve built quick scripts that scrape account histories, and then I cross-check them on an explorer to verify assumptions (oh, and by the way, humans are error-prone when parsing raw base64 data). On-chain state is raw and unforgiving, and automated parsers will trip on edge cases like partially initialized token accounts or nonstandard metadata. Going slower, with manual inspections in between automated steps, often avoids cascading mistakes that cost developer-hours later.
Wow! A true post-mortem once hinged on a single token account that was never closed. The transfer sequence made no sense until I noticed the RentExempt flag and an odd authority change. I made the rookie assumption that every SPL account follows the canonical lifecycle (create -> use -> close), and that assumption was wrong for that project. On reflection I saw that some projects intentionally keep accounts open to preserve historical data and to simplify airdrop flows, though this practice inflates the account count and complicates analytics. So yeah—ask about conventions before you build dashboards that assume clean states.
Seriously? People still ignore block commitment levels. Short aside: Solana reports processed, confirmed, and finalized states, and they are not synonyms. For most end-user UIs you want finalized data, but for real-time alerts you monitor processed and confirmed to reduce latency. On the flip side, relying only on processed can lead to transient false positives when replays or short-lived forks happen (not common, but possible), so I usually design alert systems with staged confirmations to balance speed and reliability. Initially I built alerts that fired on processed and then regretted it—too many noisy pings that taught me nothing but annoyance.
Wow! There’s an art to combining on-chain data with off-chain signals. Token metadata (like JSON URIs) can add context, but those URIs sometimes point to stale or removed content. My working rule: treat off-chain metadata as helpful but ephemeral, and anchor critical decisions to on-chain authority and supply numbers. That means when an NFT collection renames or migrates metadata, you still have the mint and owner history as the immutable trail, though you may need to do more digging to verify provenance. Also, I’m biased toward reproducible queries—if a dashboard can’t be re-run to reproduce a claim, then it’s not a reliable analytic product.

Why I Use an Explorer and How it Fits in My Workflow
Here’s the thing. An explorer gives you instant context, clickable threads, and a mental map of activity that raw RPC responses rarely provide. I love using a go-to explorer when I’m triaging issues or proving hypotheses, and one of my frequent stops is solscan because it surfaces inner instructions, displays token mints cleanly, and keeps the UI responsive even with heavy queries. On a typical day I switch between indexer queries, wallet heuristics, and the explorer to validate edge cases—sometimes in that exact order, sometimes reversed depending on urgency and how messy the dataset is.
Whoa! Automation is great, but humans still need to eyeball weird edge cases. Program-derived addresses (PDAs) and multisigs can fool naive parsers. If you treat every account the same you’ll get false classifications and missing owners, particularly when a program uses PDAs as escrow endpoints. In practice I make a small checklist: identify PDAs, confirm mint authority, check multisig thresholds, then map flows; that checklist reduces blind spots. I’m not 100% sure that checklist covers every exotic case, but it covers 95% of what I see in the wild, which is fine for most debugging sessions.
Hmm… performance matters for analytics. Pulling full token histories for a high-volume mint can be expensive and slow. One approach that works is incremental indexing: backfill once, then maintain a delta process for new signatures. On the other hand, emergent behavior like mass airdrops or rug-pulls can overwhelm deltas, so sometimes a reindex is unavoidable. My rule of thumb: invest in efficient queries (filter by mint, use start/end slot ranges) and expect to reindex occasionally if you need historical accuracy—it’s part of running production-grade tooling on Solana.
Really? Yep—watch out for metadata inconsistencies when joining token data to off-chain registries. Some collections register multiple metadata URIs over time, and token holders might migrate tokens between mints as part of upgrades. On the surface this looks like duplication, though actually it’s a migration artifact that needs careful handling to avoid double-counting supply. For analysis, always join on the mint and then fold in metadata as an enrichment, not as the primary key; that pattern reduces surprises and makes reconciliation easier if a project migrates.
Whoa! One more practical tip about signatures and confirmations: signatures are primary identifiers but they can be reused in error-prone ways by scripts. I once saw a bot re-submit the same payload repeatedly, generating many signatures that were all related to a single failing CPI; human readers saw noise, but once I collapsed repeated instruction payloads by hash the story cleared. Tools that group by instruction hash or that normalize repeated CPIs help a lot with signal-to-noise. That extra normalization step seems small, but it turns messy logs into a readable timeline, which is huge when you are under pressure.
FAQ: Quick answers for common tracking problems
How do I trace an SPL token transfer across multiple accounts?
Start at the mint address and follow token transfers to associated token accounts; short transfers are often intermediary hops, so collapse accounts owned by the same wallet to reduce noise. Check inner instructions and program logs to see if CPIs moved balances in ways that don’t show up as top-level transfers. Also verify the token’s supply and decimals from the mint to ensure you aren’t misreading amounts due to decimal mismatch.
What’s the best way to detect wash trading or circular flows?
Look for rapid transfers among a small set of accounts with little external inflow or outflow, and cross-check ownership of those accounts (common wallets are a red flag). Time clustering helps: many wash trades happen within narrow slot windows. I’m not perfect at catching every pattern, but combining ownership heuristics with transfer-frequency filters catches most cases without too many false positives.
Can explorers replace my analytics stack?
No. Explorers are invaluable for inspection and quick validation, but you still need reproducible queries, reliable indexers, and programmatic access to data for production workflows. Use an explorer as a verification and discovery tool, and keep a well-documented pipeline for automated reporting and alerts. That hybrid workflow—manual plus automated—keeps teams fast and honest.
-
How I Track Wallets, DeFi Flows, and Tokens on Solana (practical notes)
Whoa, seriously wow! I was poking around wallet trackers on Solana last week. Something felt off with how most dashboards surface token flows. Initially I thought the problem was just UX, but then I realized that data latency and inconsistent labeling in token metadata cause real confusion for developers and end users alike. My instinct said we could do better with event-level traces and clearer ownership views.
Hmm… good question. Wallet trackers promise clarity, but they often miss edge cases. For example, wrapped tokens and burn-mint patterns get hidden in many UIs. On one hand you want a clean summary, though actually if you dig into raw instructions and inner instructions you uncover the real provenance of a token move which matters for forensic analysis and smart contract audits. That depth is the difference between pretty charts and reliable tooling.
Seriously, this matters. Developers building DeFi need both high-fidelity traces and aggregated metrics. On Solana you also must handle multi-instruction transactions and ephemeral accounts. Because Solana’s runtime composes many operations into single transactions, a naive token tracker that only reads balances before and after will miss minted fees, wrapped transfers, and cross-program invocations that move assets without changing a single account’s long term balance. I’m biased, but I believe visibility into instruction-level logs is essential for trust.
Here’s the thing. Wallet trackers can do three core things well today. First: continuous address monitoring with real time alerts and filtering. Second: token analytics that reconcile mints, burns, and wrapped flows across SPL and foreign token bridges so that a developer can programmatically determine whether a balance change was a transfer, a wrap, or a contract side-effect. Third: a token registry that’s maintainable, audit-friendly, and resilient to bad metadata.
Whoa, hold up. Token registries are trickier than they initially seem for many reasons. Name collisions happen, symbol reuse occurs, and marketplaces cache stale info. So you need approaches that combine on-chain heuristics, off-chain curation, and community signals (yes, moderation by humans matters, don’t be shy about that) to avoid mislabeling high value assets. That hybrid model reduces false positives while keeping automation usable.
Hmm… somethin’ else. Analytics should be event-first, not balance-first, for actionable insights. Event-first means capturing transfer events, inner instructions, and token account lifecycle. When you stitch events with timing, payer signatures, and program ids you can answer questions like which DEX matched a swap or whether a synthetic mint later got burned, which matters for compliance, fraud detection, and user support. Solana’s block times and optimistic confirmations make accurate timestamping a little messy sometimes.
Whoa! Seriously though. Performance is non negotiable for on-chain explorers that serve both dashboards and APIs. Indexing strategies must be parallel, idempotent, and replay-safe across restarts. That means you choose streaming parsers, sharded state stores, and careful checkpointing so you can recover quickly after outages while continuing to provide consistent reads across pagination and historical queries. Caching must be smart and eviction policies predictable to avoid stale token labels.
Check this out—. Here’s an example diagram of an event-first pipeline that I sketched recently. It ingests blocks, parses transactions, extracts inner events, enriches them with metadata. Then a secondary system deduplicates related events, resolves token identities, and emits normalized records to downstream analytics and alerting services so product teams can build features rather than babysit data. This approach feels rusty on paper but in practice reduces support load significantly.
Tools I use
Not perfect though. I often open solscan to trace a token or validate transaction execution. It surfaces inner instruction sequences and shows native program logs which is handy. Actually, wait—let me rephrase that: solscan isn’t a silver bullet, though it surfaces a lot of helpful artifacts and quick links to accounts that speed up triage for most common issues developers run into. If you pair it with local indexers and your own heuristics, you get real power.
I’m not 100% sure. There are trade offs to every design decision, particularly around latency versus completeness. You can push freshness to seconds but pay cost in compute and storage. On the other hand if you prioritize cheap storage and batch processing you risk missing fast arbitrage and flash loans which are exactly the behaviors DeFi teams need to monitor for safety. Designing a wallet tracker is therefore an exercise in pragmatic compromise.
This part bugs me. Metadata drift still plagues token tooling and causes user confusion and bad analytics. Automated heuristics sometimes misattribute wrapped assets and create noisy alerts. To mitigate this you want multi-signal verification, human-in-the-loop overrides, and transparent provenance for each token record so auditors can trace decisions back to on-chain evidence and community votes. I’m biased toward open processes and verifiable curation policies.
Wow, what a ride. Tracking wallets, tokens, and DeFi on Solana is messy but rewarding. You learn quickly which teams care about accuracy and which ship rough features. Initially I thought a single dashboard could solve most problems, but then realized the real solution is a stack of interoperable systems—indexers, explorers, registries, and alerting layers—that together give developers confidence and give users safer experiences. If you’re building tooling, start data-first, instrument everything, and be ready to adjust your heuristics down the road.
FAQ
How do I start building a wallet tracker on Solana?
Start small and focus on events. Capture transaction and inner-instruction events first, enrich them with token mint info, and keep a compact history for each address. Use checkpoints and idempotent processors to handle reorgs and restarts. Also, ask a few trusted engineers to review your labeling rules early—very very important to catch edge cases before they scale.
When should I rely on explorers versus running my own indexer?
Use explorers for quick triage and manual audits, and run your own indexer for production workflows that need deterministic answers and low-latency alerts. Explorers save time, though they can be rate-limited or incomplete; your own stack buys control at operational cost. Mix both: triage with explorers, verify with your indexer, and automate common checks to reduce manual toil.